


A sales landing page can be a valuable asset for driving growth in your online business, no matter what kind of business you run. A well-crafted and targeted landing page has the potential to draw in customers, generate leads, and boost sales.
In this guide, we’ll discover the process of producing a sales-free landing page through WordPress, which is set up on a hosting service with a personalized domain. Through a simple series of steps, we’ll design an appealing page to encourage potential customers to take specific actions like making a purchase or signing up.
Discover how to enhance your online presence using this essential resource commonly utilized in digital marketing.
What is a sales landing page?
A sales landing page is a webpage created with the purpose of converting visitors into leads or customers by highlighting a particular offer like a product, service, or content. Unlike regular website pages, sales landing pages are focused on achieving a specific goal, often involving a purchase or collecting contact details.
These pages are meticulously created to lead visitors through a sales process, offering concise and persuasive details about a specific promotion.
A sales landing page typically includes an attractive layout, a captivating title and description, impressive benefits, customer reviews, informative visual elements, and a straightforward call to action.
An efficient sales landing page must be clear, making sure visitors understand the product and its benefits.
Examples of landing pages for sales
Images can often convey more meaning than words. To enhance the ideas I have discussed, I have provided several sales landing pages from various sectors as examples.
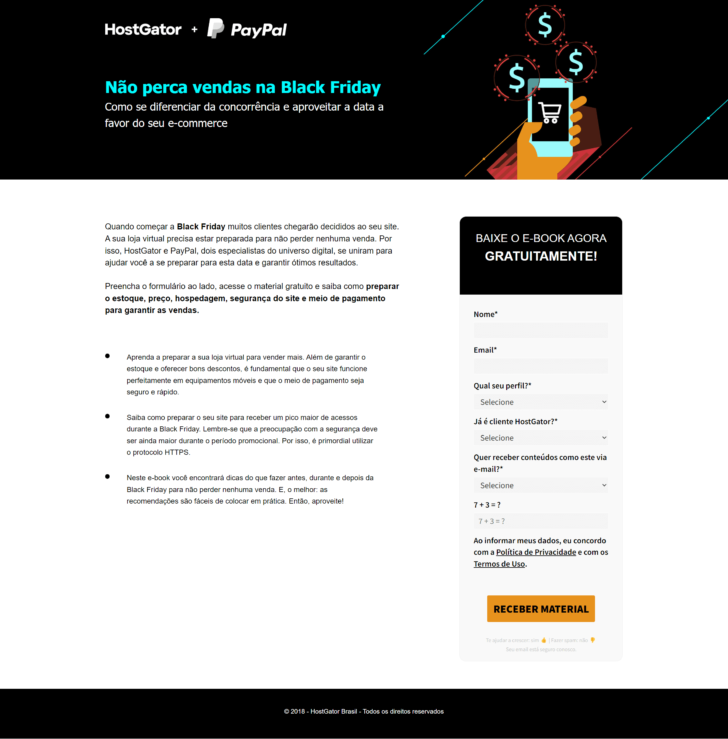
A landing page is used by HostGator, a hosting provider, to offer a free e-book on Black Friday sales in exchange for user information like name and email. The main aim is to gather potential customers known as leads, who could potentially make a purchase in the future. This strategy of lead capture is common online and is aimed at establishing a relationship with the brand for potential future sales.
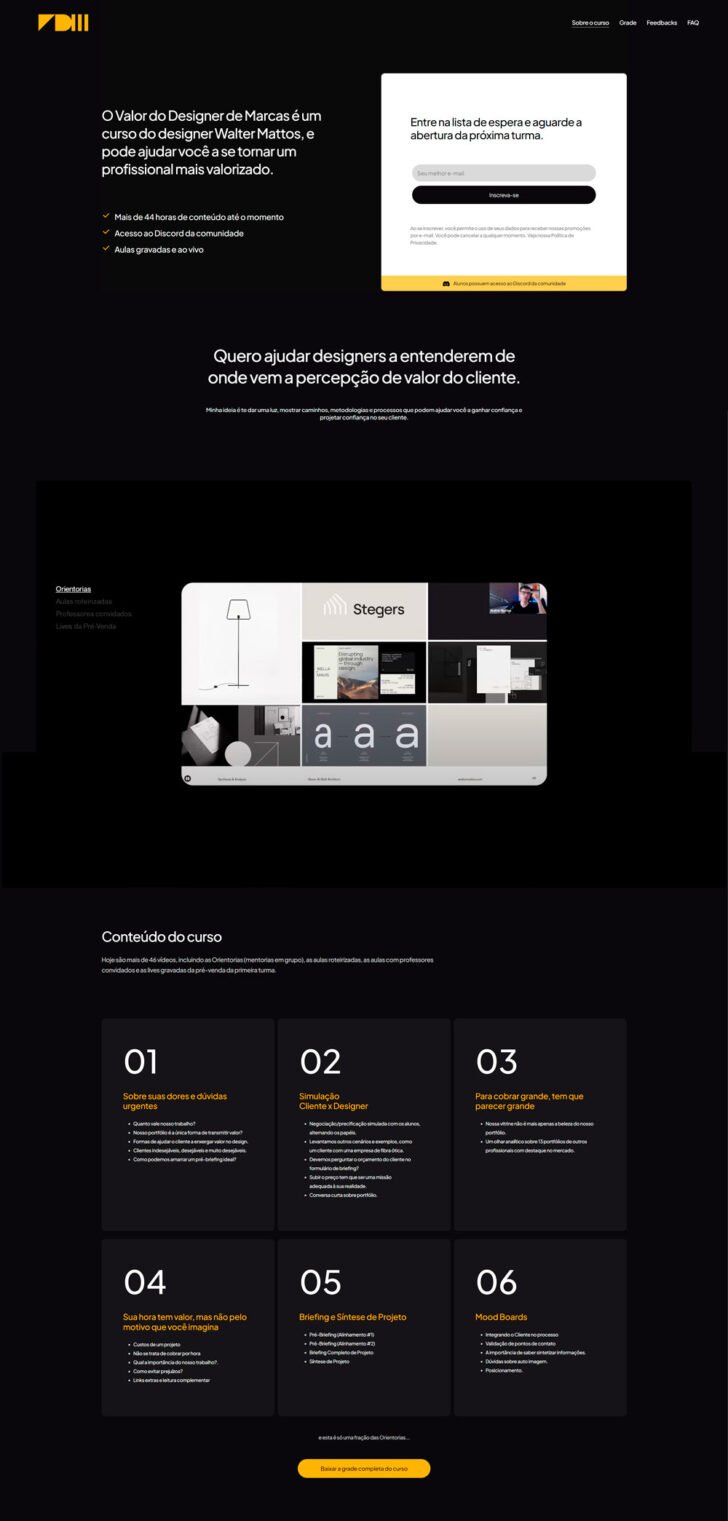
The landing page for course sales aims to promote and sell a course effectively. It features clear information about the course and its objectives at the top of the page. The call to action is prominently displayed in the initial section, prompting visitors to sign up for the waiting list for the upcoming class. As users scroll down, they encounter essential details that build trust and persuade them to enroll in the course. These elements include a presentation video, the full course curriculum, student testimonials, and Walter’s portfolio.
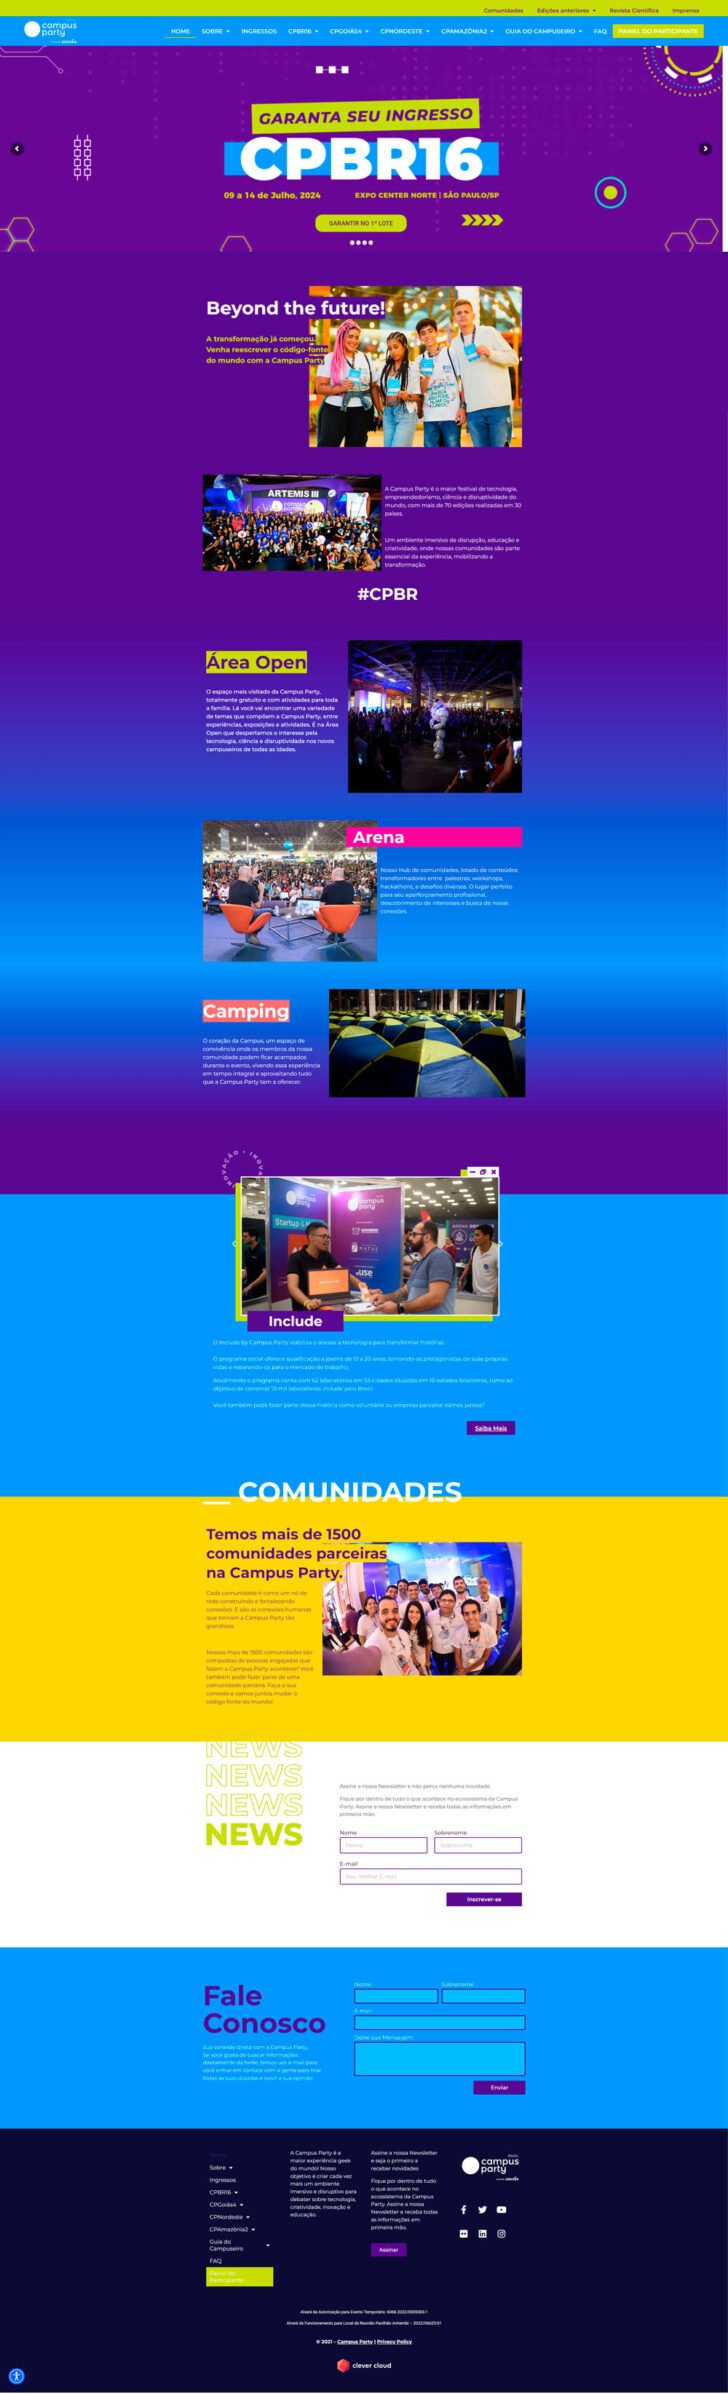
The approach to creating a sales page for a music festival can vary depending on the business niche. For music festivals, the main focus is usually on the artists, with minimal text on the page and emphasis on attractions and calls-to-action for ticket purchases.

Campus Party Brazil, one of the biggest tech events in the country, showcases a call to action at the start of its landing page (“get your ticket”) and offers snippets of details about different event sectors throughout the page.
Creating a sales landing page – A guide
Let’s now initiate the page creation process efficiently after reviewing several landing page examples.
Planning for a landing page
It is crucial to have a clear understanding of your objectives and the desired outcome of user actions before beginning.
Examples of goals include:
- Generate a user community by setting up a registration page.
- Register for any type of activity, whether it is a course or an event, whether it is free or requires payment.
- Sell a product or service.
A landing page is designed to focus on a specific objective, while a virtual store is more suitable for selling a variety of products or services.
We recently released a guide on building an online shop with WooCommerce, available for viewing here.
The final step, commonly referred to as a call to action (CTA) in digital marketing, should be clearly visible on your landing page. A CTA typically appears as a button on the page and prompts the user to take a specific action.
- Direct the user to the product or service’s shopping cart.
- Open a sign-up form.
- To guide the user to an external payment platform for making a purchase.
Domain selection
A domain is the location of a specific website or webpage, like mywebsite.com.br. In the context of landing pages, it is typical to see domains designed for the sole purpose of promoting a particular product or service.
- Cursoxyx website.
- The method achieves its goal effectively.
- The spreadsheet is focused on thinning out.
It is entirely feasible to include a landing page within an already existing website. The previous examples can be adjusted to become integrated into a site that is already live.
- mysite. with.br/cursoxyz
- mysite. com.br/methodalcanceobjectivex
- mysite. with.br/plannerrevolutionalthine
Entrepreneurs have the responsibility to determine their strategy and implement the use of a domain in a way that they deem suitable. Utilizing a distinct domain for selling a specific product, especially for landing pages, is a common practice that can enhance the perceived value of the offering and boost conversion rates. However, the effectiveness of this approach varies based on the individual business planning and execution.
Hosting options to choose from
Choosing the appropriate hosting service for your landing page is crucial for the success of an online business. It may be necessary to opt for a more robust hosting solution capable of handling a high volume of visitors simultaneously, especially for businesses anticipating significant traffic. However, for startups, there are affordable hosting options available in the market.
We will utilize HostGator shared hosting for this tutorial. The company is dependable and caters to clients of varying needs. While the Start plan is a good choice among the shared options, the higher plans, such as the Turbo plan, provide additional features and capabilities. The landing page we will create can be made on any of the available plans offered by HostGator.
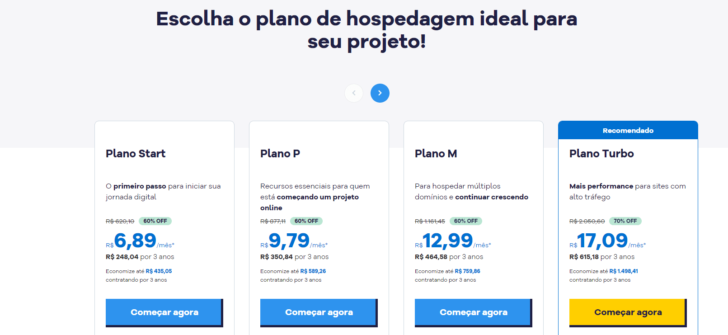
Visit this page to discover HostGator’s plans and pricing for their hosting services.
WordPress Installation
WordPress will be utilized in this guide for crafting landing pages. Known as the most widely used content management system globally for website development, WordPress caters to websites, blogs, online stores, and landing pages. Its block system enables easy layout and template customization, as demonstrated further in this tutorial.
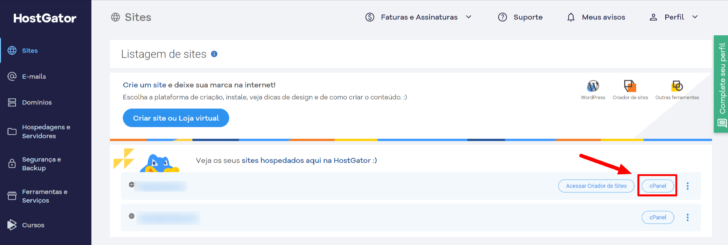
After hiring the hosting service and registering a domain, proceed to the client panel and access the cPanel link.
chsyys/Pexels
The cPanel used by HostGator is a feature-rich control panel with numerous setup options. Once the domain is set up, an SSL certificate is automatically installed, enabling encrypted traffic for your landing page via the HTTPS protocol. Other companies typically require a manual SSL certificate installation process that varies by provider.
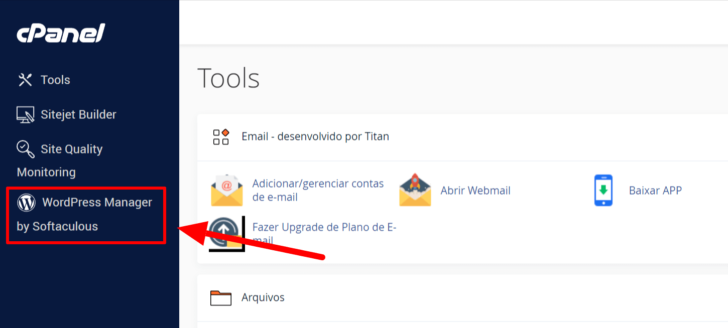
Click on the WordPress Manager link in the cPanel to access the WordPress facility manager.
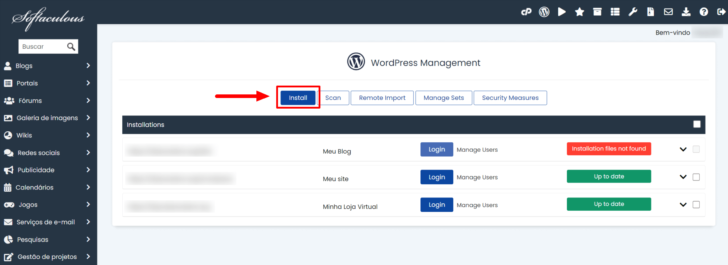
Clicking the Install button within the installer sets up a fresh WordPress installation.
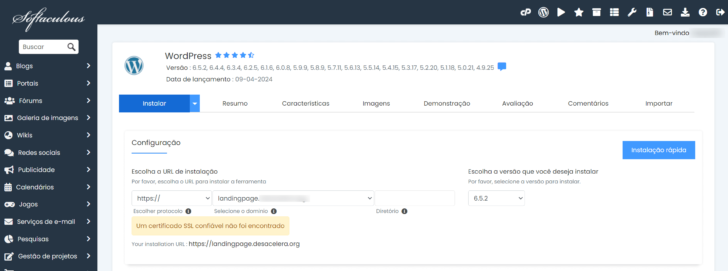
The setup screen will appear. Enter the required details for your landing page into the form. To set up a landing page as the main page of your domain (like cursoxyx.com.br), choose the domain and keep the “directory” field empty.
If the domain is already set up on the hosting, there is no need to be concerned about the “An SSL certificate has not been found” alert, as it will be automatically installed following the domain configuration.
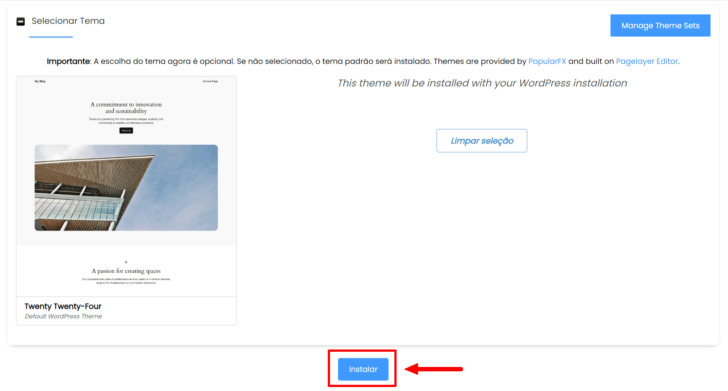
Fill out the form, choose the desired plugins (or leave them unselected as they can be added later), and scroll to the bottom of the page. For the theme selection, we will opt for the Twenty Twenty Four theme, the default WordPress theme for new installations with significant features integrated into the WordPress block system.
Click the Install button after completing all the information to begin the installation process.
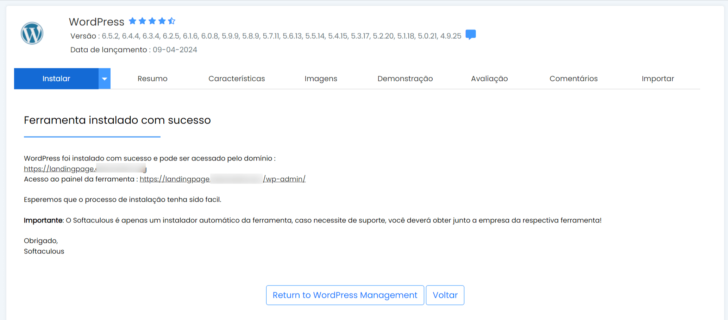
After the installation is complete, a message indicating success will appear, allowing you to access the WordPress panel by clicking on the provided link.
Learn how to build websites with artificial intelligence using WordPress and HostGator IA.
Initial configurations for the landing page
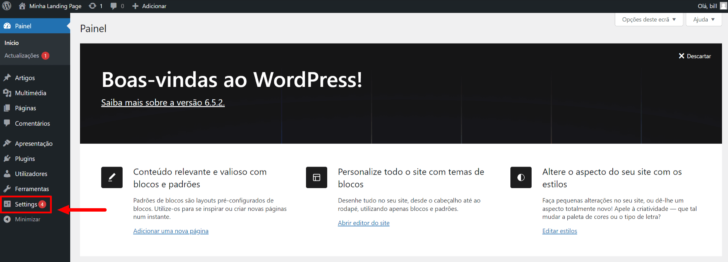
Upon first logging into WordPress, you will encounter a welcoming message along with links to various tools. It is advisable to explore these links before making any modifications. Additionally, I suggest visiting the Settings page or the corresponding page in Portuguese prior to proceeding.
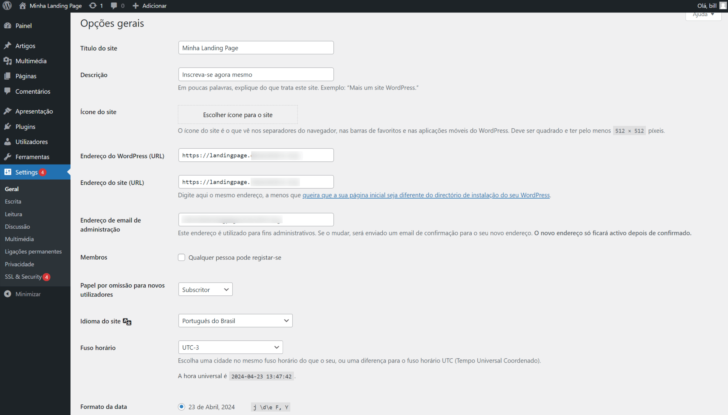
Important modifications can be made on the settings page, like:
- Examine the title and description of the website.
- Check the admin email for receiving notifications regarding site issues or updates.
- Switch the language setting to Brazilian Portuguese from European Portuguese.
- Adjust the time zone to UTC-3, which corresponds to Brasilia’s time zone (or adjust it according to your region).
- Set the format for displaying the date.
Click on the Save button located at the bottom of the page after adjusting the settings to ensure that the modifications are applied.
Creating a landing page
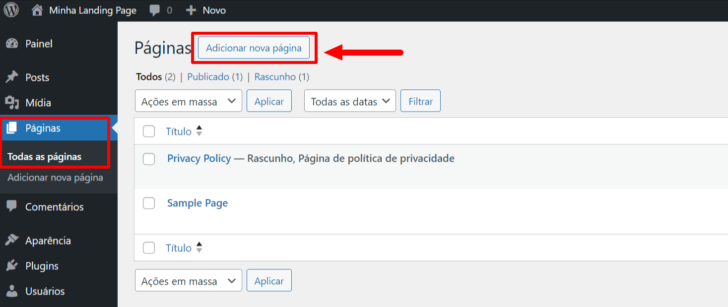
Now we are prepared to commence constructing our landing page. To do this, we will generate a new page by navigating to the side menu, clicking on Pages, and selecting Add new page.
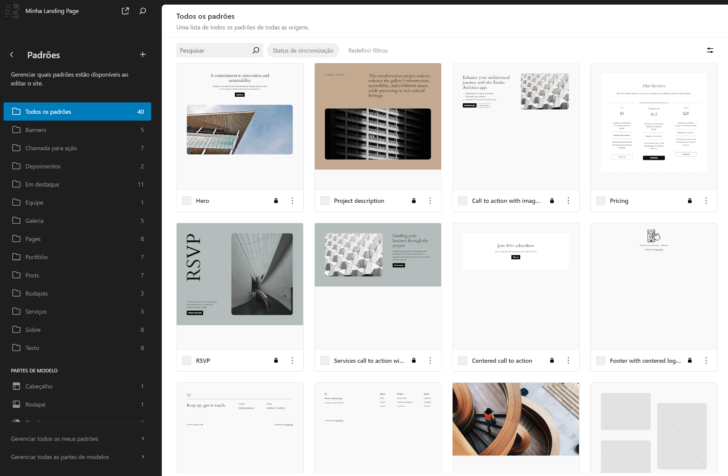
After creating a new page in the theme, various page layouts are shown for selection. I opted for the initial choice, designed for an “About” page, but it can be customized like any other layout.
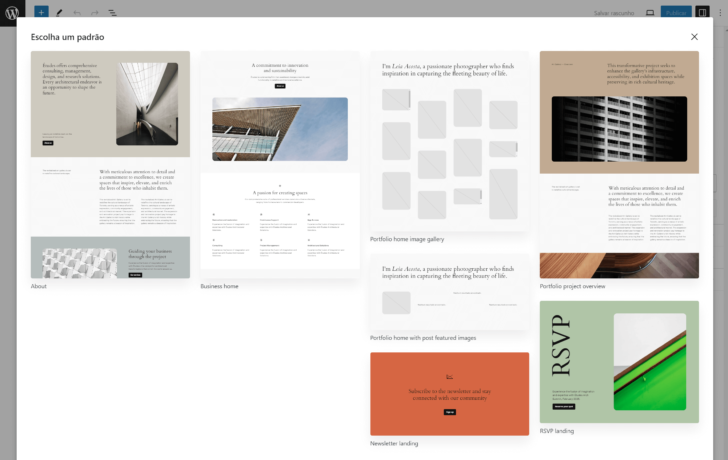
The design features a structured content that comprises images, text styles, and color schemes.
chsyys/FreeImages
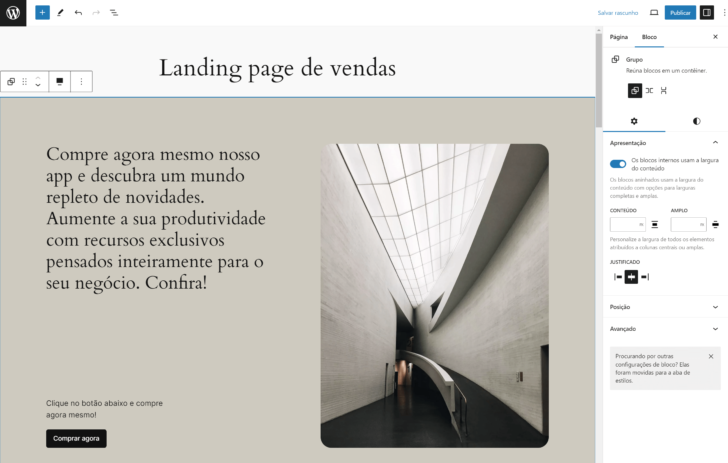
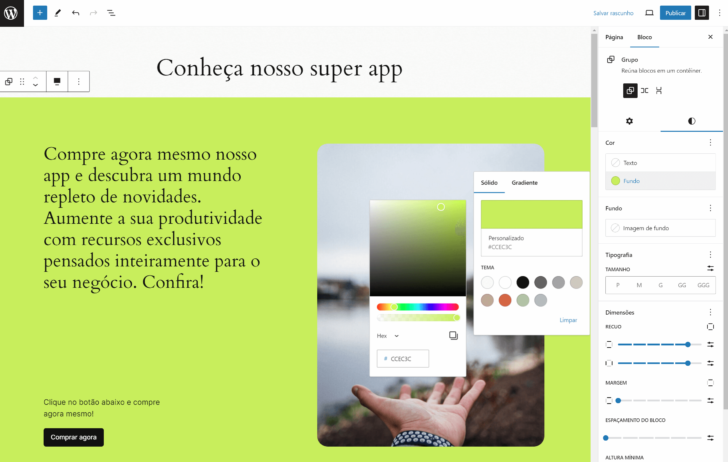
To modify any element, click on it to view the available options on the element and in the sidebar Blocks. I quickly began adjusting the texts and image to suit my landing page. The images I utilized were sourced from Unsplash, a leading free image repository.
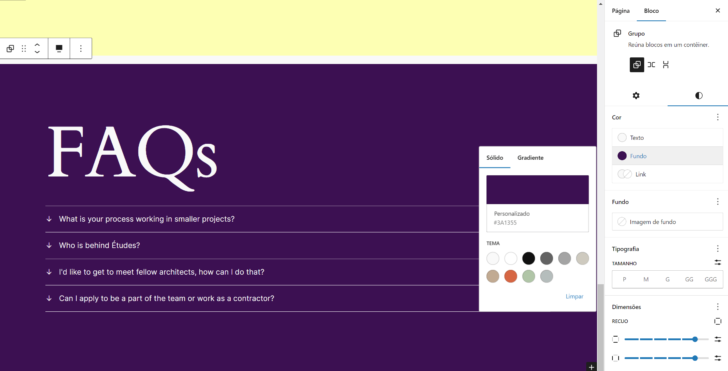
To modify the background color of a set of blocks, simply click on it and choose the tab with the light and dark symbol. In the Color section, you can adjust both the background color and the text.
chsyys/PixaBay
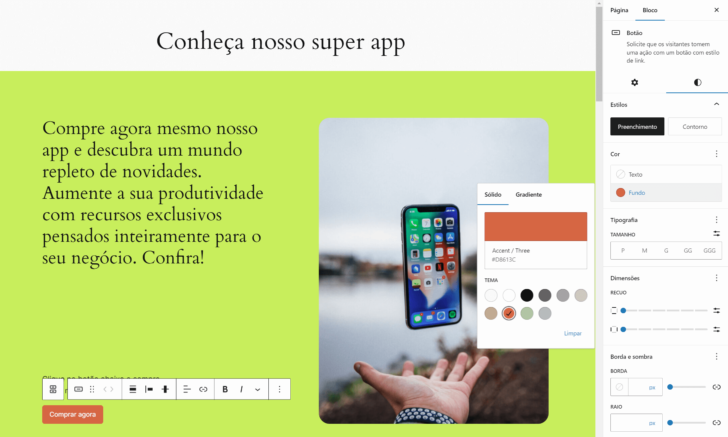
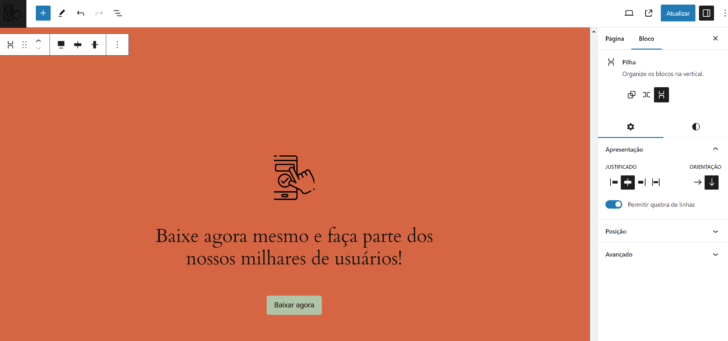
I also modified the color of my call-to-action button in the same way by clicking on the element and accessing the color management tab.
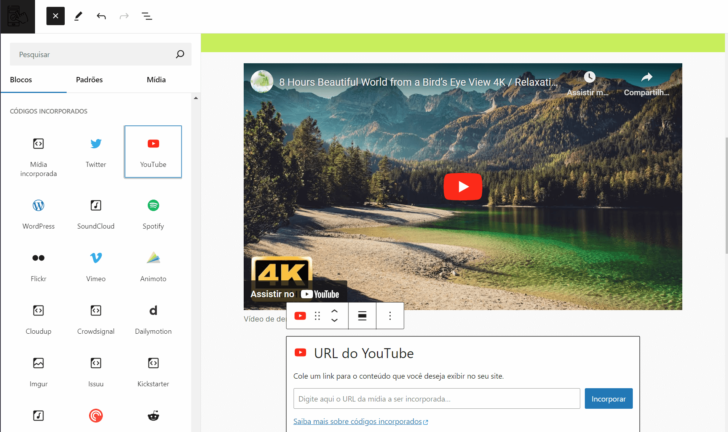
To add a video to my landing page, I can click the “+” icon on the dashboard and choose the Video block or use the YouTube block to embed a video from YouTube by entering the video link.
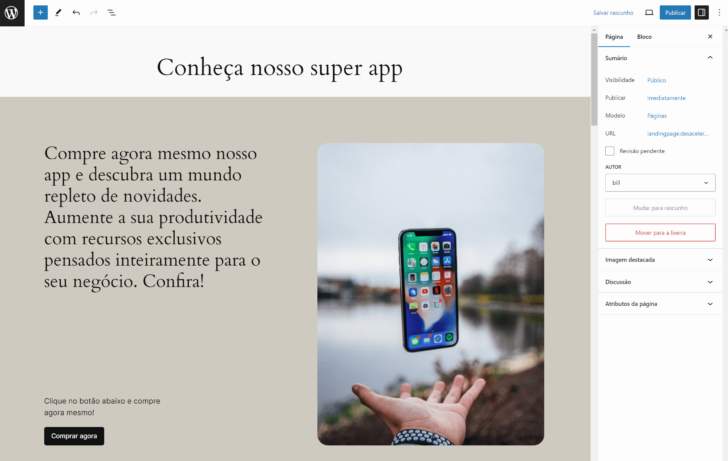
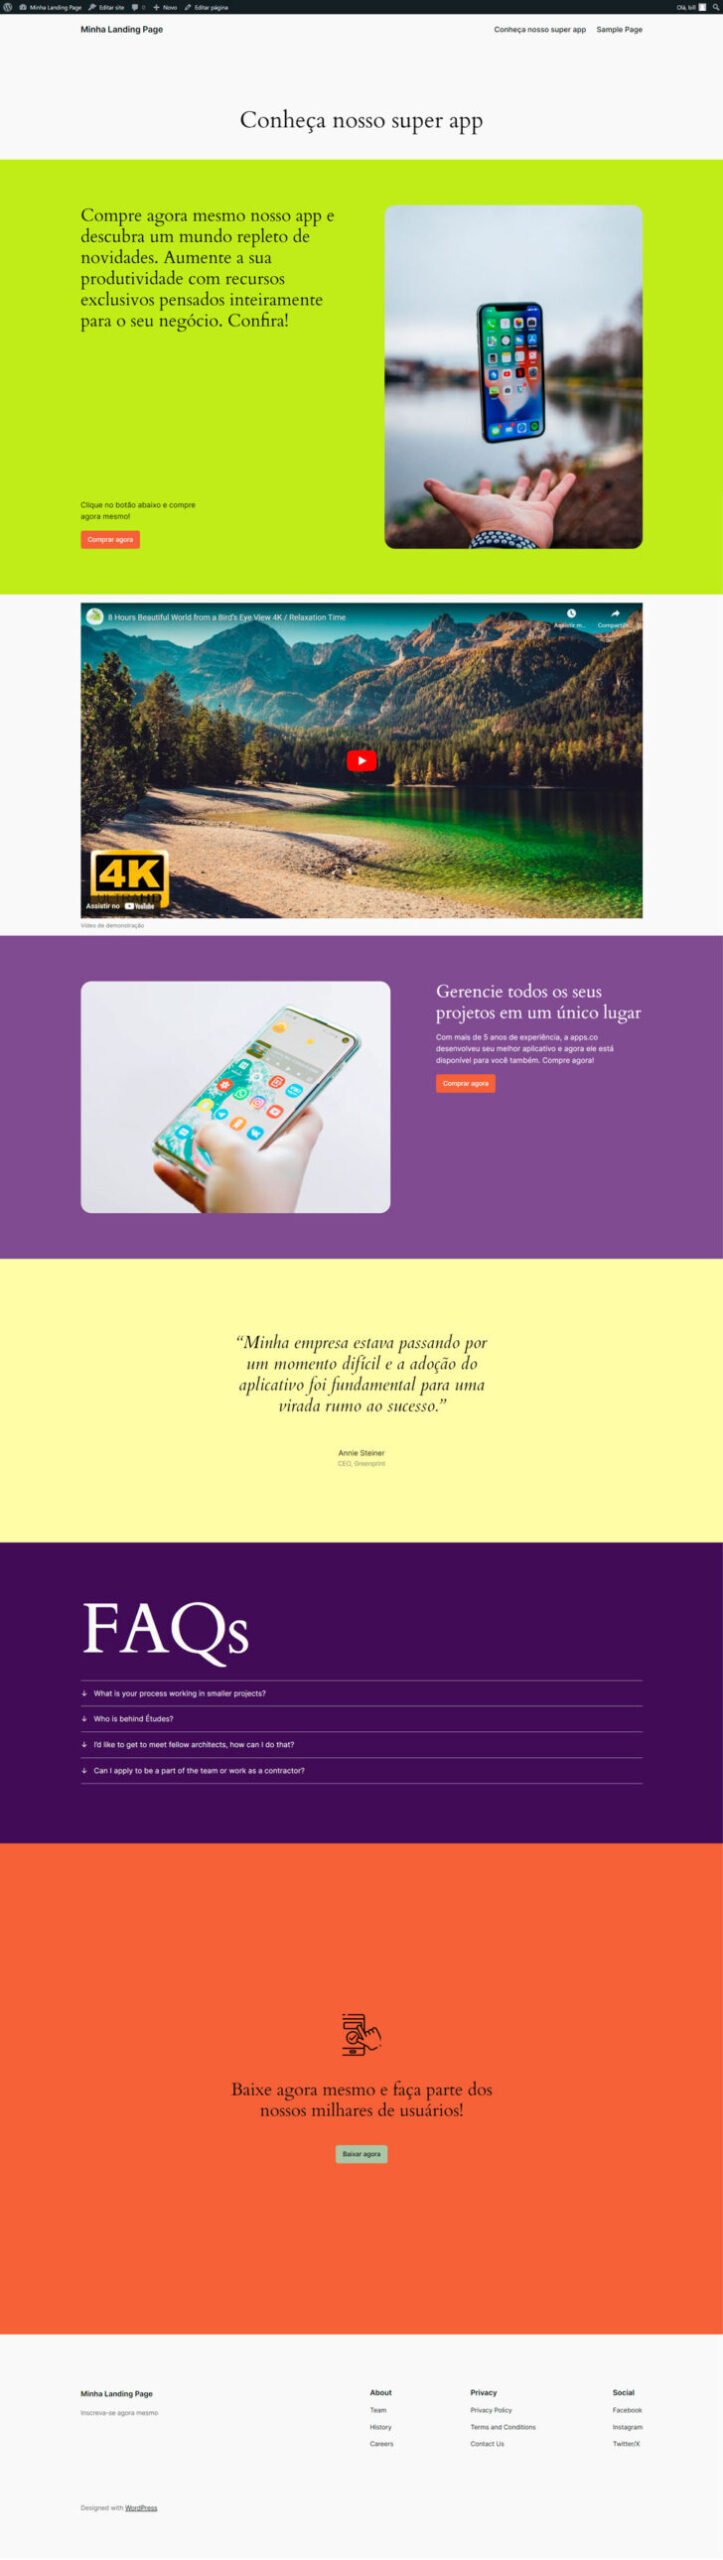
I continued to customize the remaining parts of the page by altering colors, images, and text.
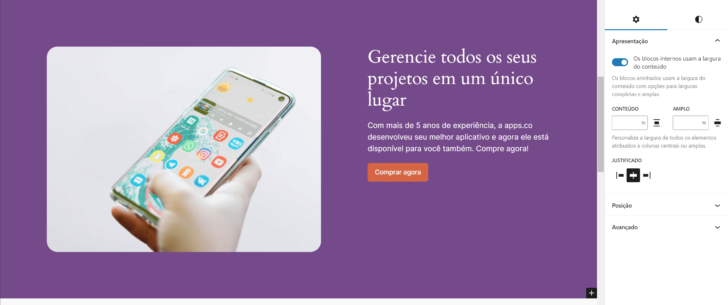
I added a section of customer reviews, which can be found in the theme’s options. By clicking on the “+” icon at the top left of the page, you can access various categories of design templates.
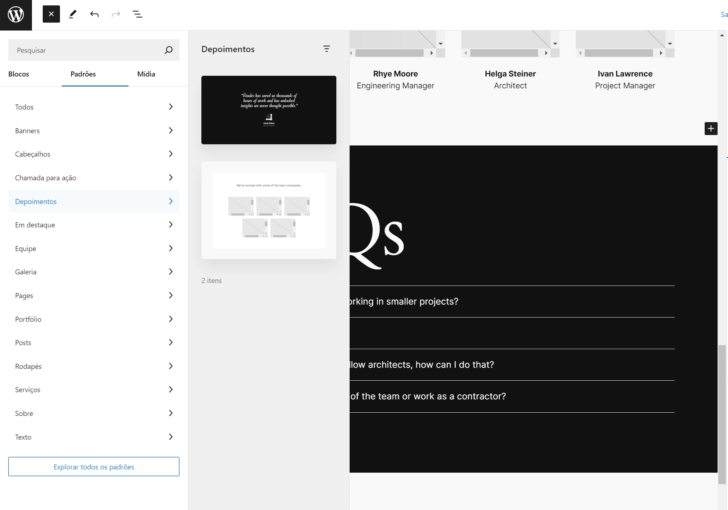
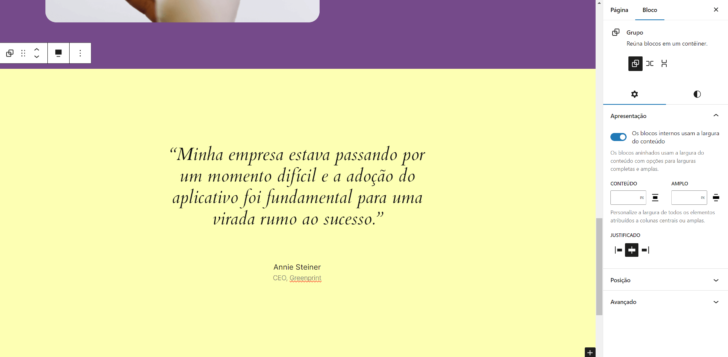
I modified the statement and proceeded.
The selected page template includes a FAQ section that can be customized as desired.
At the bottom of the page, I added a new personalized call to action.
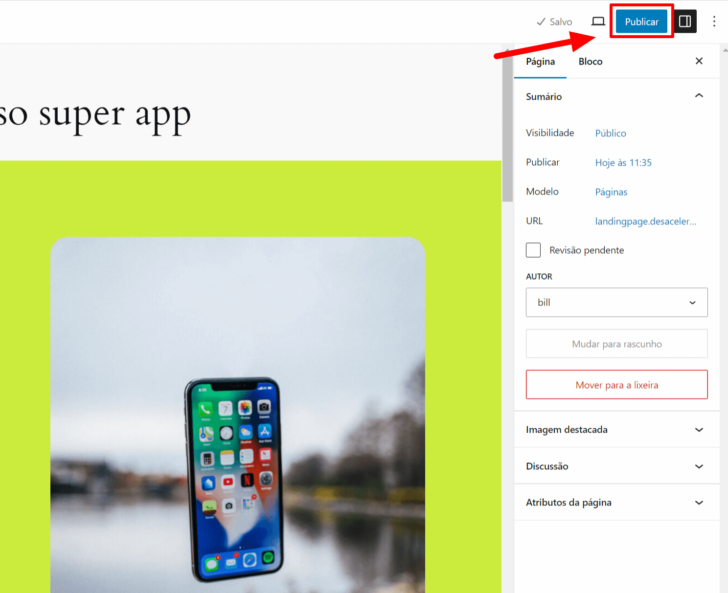
After making changes to the page, I selected the Publish option located at the upper right corner of the panel to share the page on the website.
Establishing the landing page on the main website domain.
If you opt for a unique domain for your landing page, you likely prefer it to appear directly at the domain root, like mylandingpage.com.br. When creating a new page on WordPress, it won’t automatically show up in the website menu. To do so, you need to make an extra configuration.
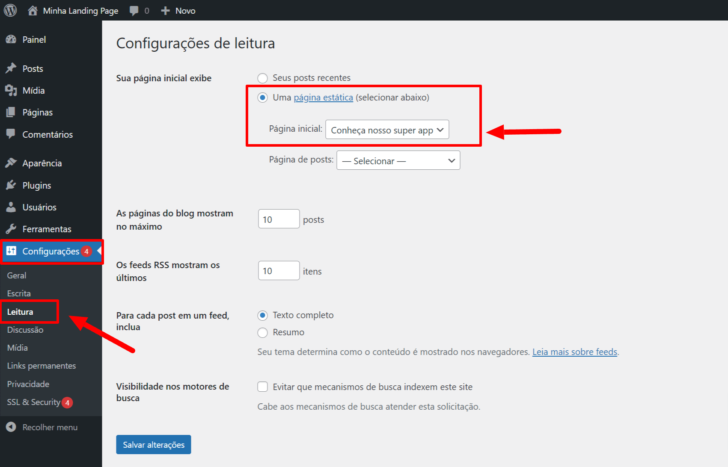
In WordPress, go to the side menu, click on Settings, then select Read. Within the Read settings, switch the Your homepage displays option to a static page and choose the newly created page.
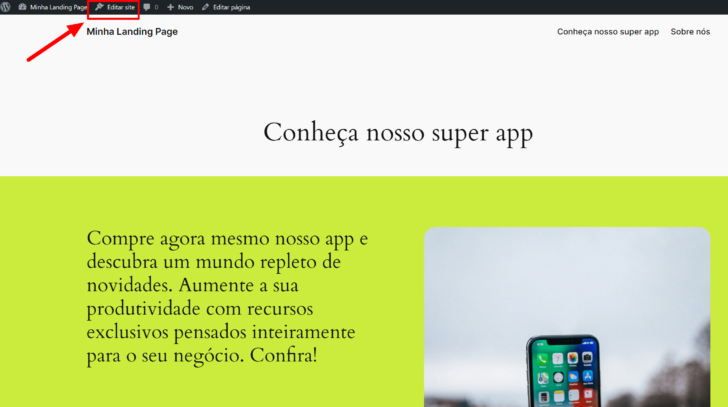
After implementing this modification, clicking on the Visit site link now directs me to the landing page displayed on the homepage.
Additional appearance options
Various adjustments can be made on WordPress. When it comes to setting up a website, you may wish to add a logo, personalize the header and footer, and modify the default menu. These changes can be made using the Edit site feature available in the top bar for logged-in users or in the internal menu under Appearance -> Editor.
The site administrator can access different customization options through the editing mode, including browsing the site, editing pages, and using grouped blocks as customizable models.
It is engaging to explore and experiment with the choices to discover all the customization possibilities of WordPress. Notably, all of this was achieved without installing extra plugins and by utilizing the latest WordPress default theme, Twenty Twenty Four.
Next actions for your sales landing page
After you have published the page, you may need to make further modifications, such as adding plugins for various purposes like SEO optimization, Google Analytics for monitoring visits, lead capture, payment integration, and more.
The article demonstrates that it is feasible and uncomplicated to develop a sales landing page utilizing a free hosting, domain, and WordPress setup. It’s advisable to explore more advanced settings for a professional sales landing page project.
If you have any inquiries or ideas regarding the article, feel free to comment, and I will assist you to the best of my ability.
I provide a link to the top website hosting options for those planning a sales landing page. Hope it helps!
Publication date: 25/04/2024 (last updated on 25/04/2025)
Tags: Guides, WordPress